0
Guides

How to connect the LockApp Hub to the Shelly and Rav-Bariach apps

January 16, 20223 min read

Bought a LockApp Hub? We’ll help you set up your smart lock in the Rav-Bariach and Shelly apps 🙂

This guide explains step by step how to add the Hub to the Rav-Bariach and Shelly apps. First, connect the Hub to power

1. Download the Shelly Cloud app and the Rav-Bariach app from GooglePlay (Android) or AppStore (iPhone).
2. Create an account on the Shelly Cloud app login screen
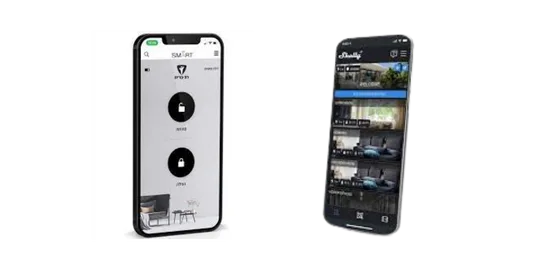
Shelly Cloud and Rav-Bariach app icons for download from the app stores
Account creation and login screen in the Shelly Cloud app on a phone
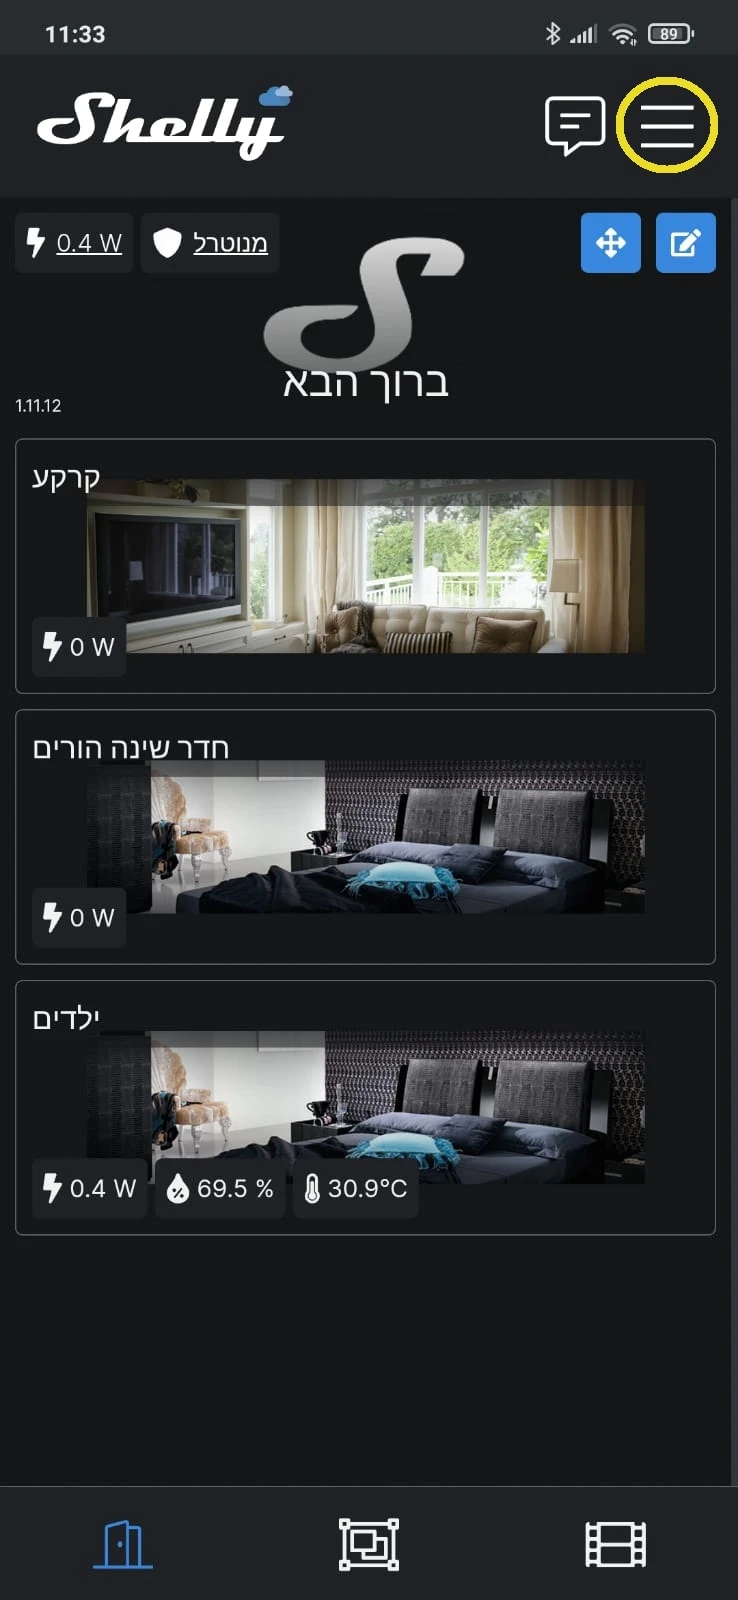
3. Tap the app menu
(the three-line icon)
The Shelly Cloud app menu, opened by tapping the three-line icon
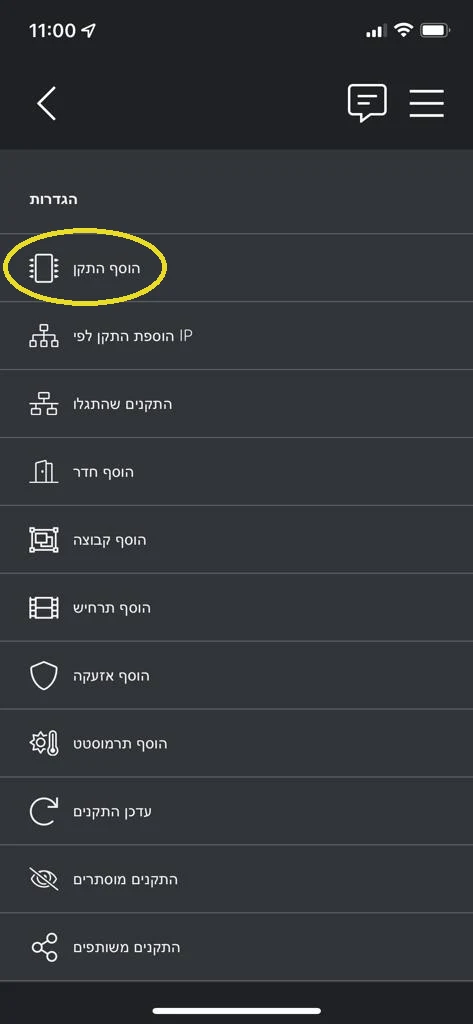
4. Tap Add Device
Shelly Cloud app screen with the Add Device option
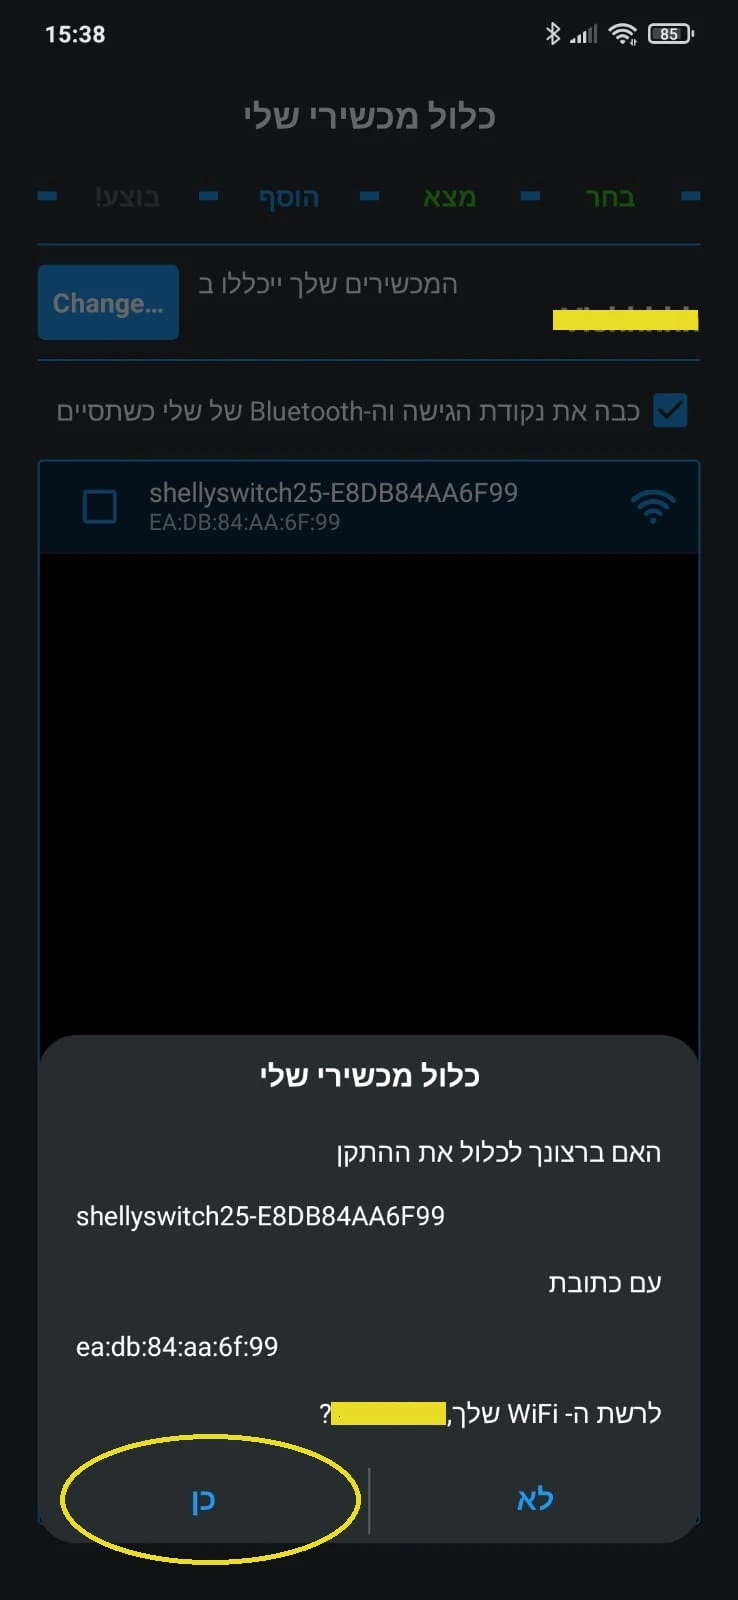
5. On Android, allow the device to join your home network
Confirming the device is added to the home Wi-Fi network on an Android phone
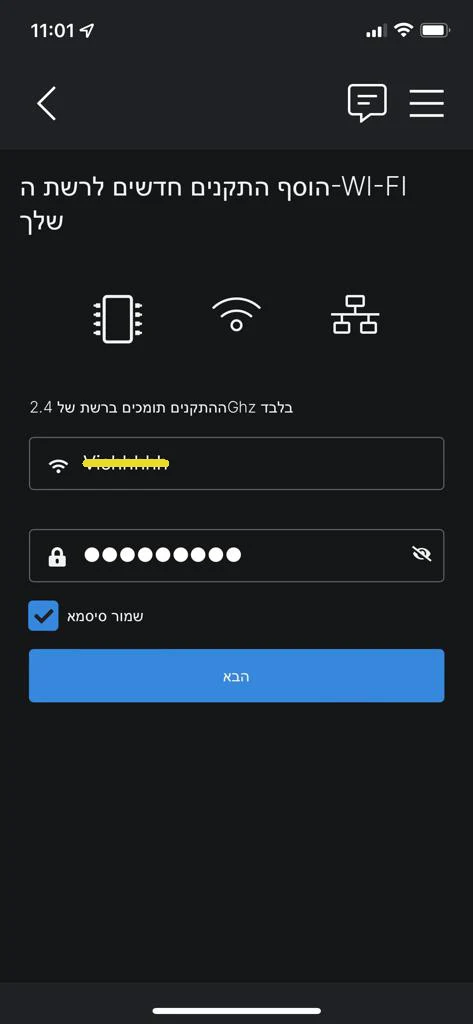
6. On iPhone, choose your home network name, enter the password and tap Next
Note that the password is case-sensitive
Choosing the Wi-Fi network name and entering the password in the Shelly app on iPhone
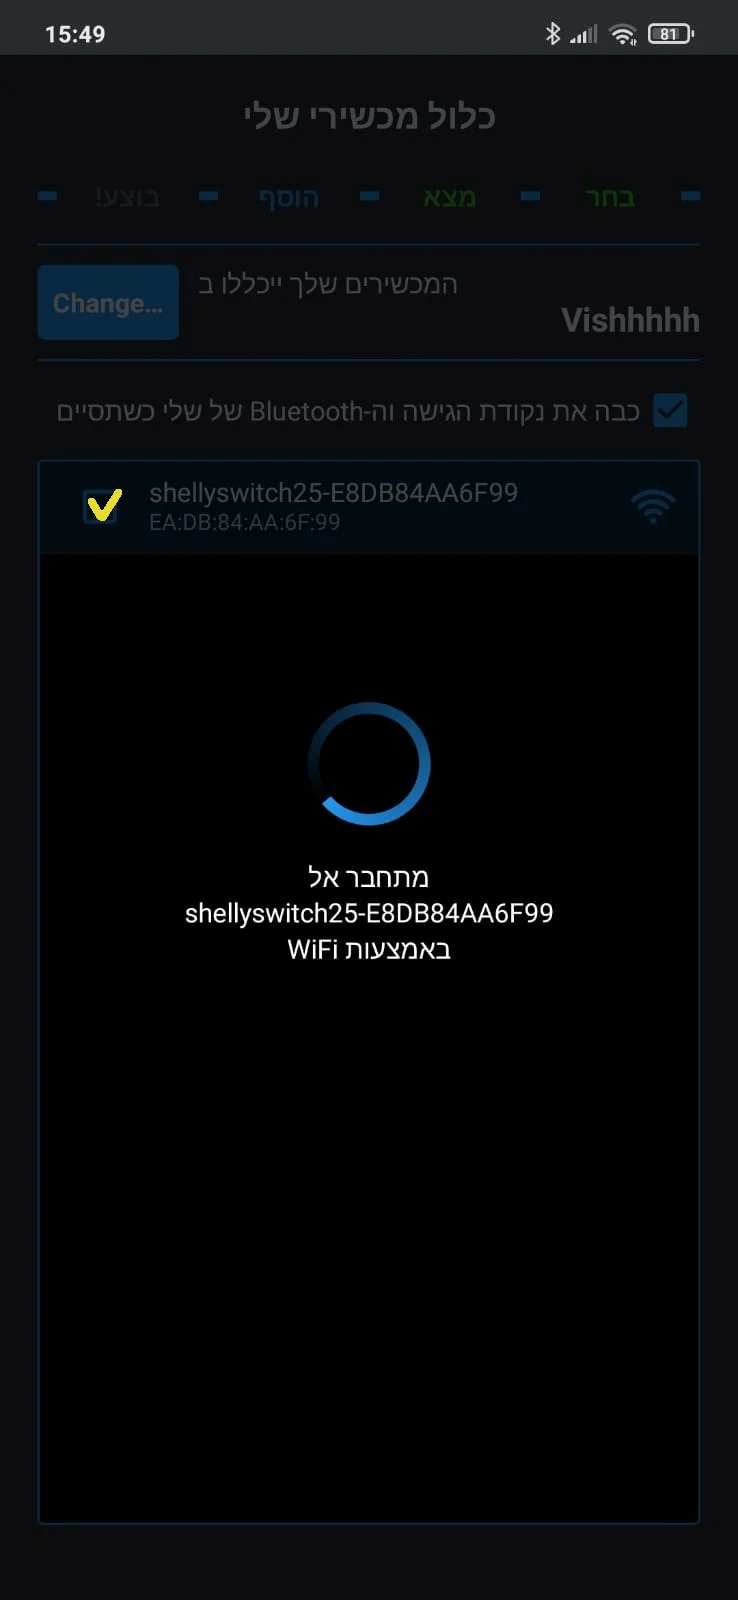
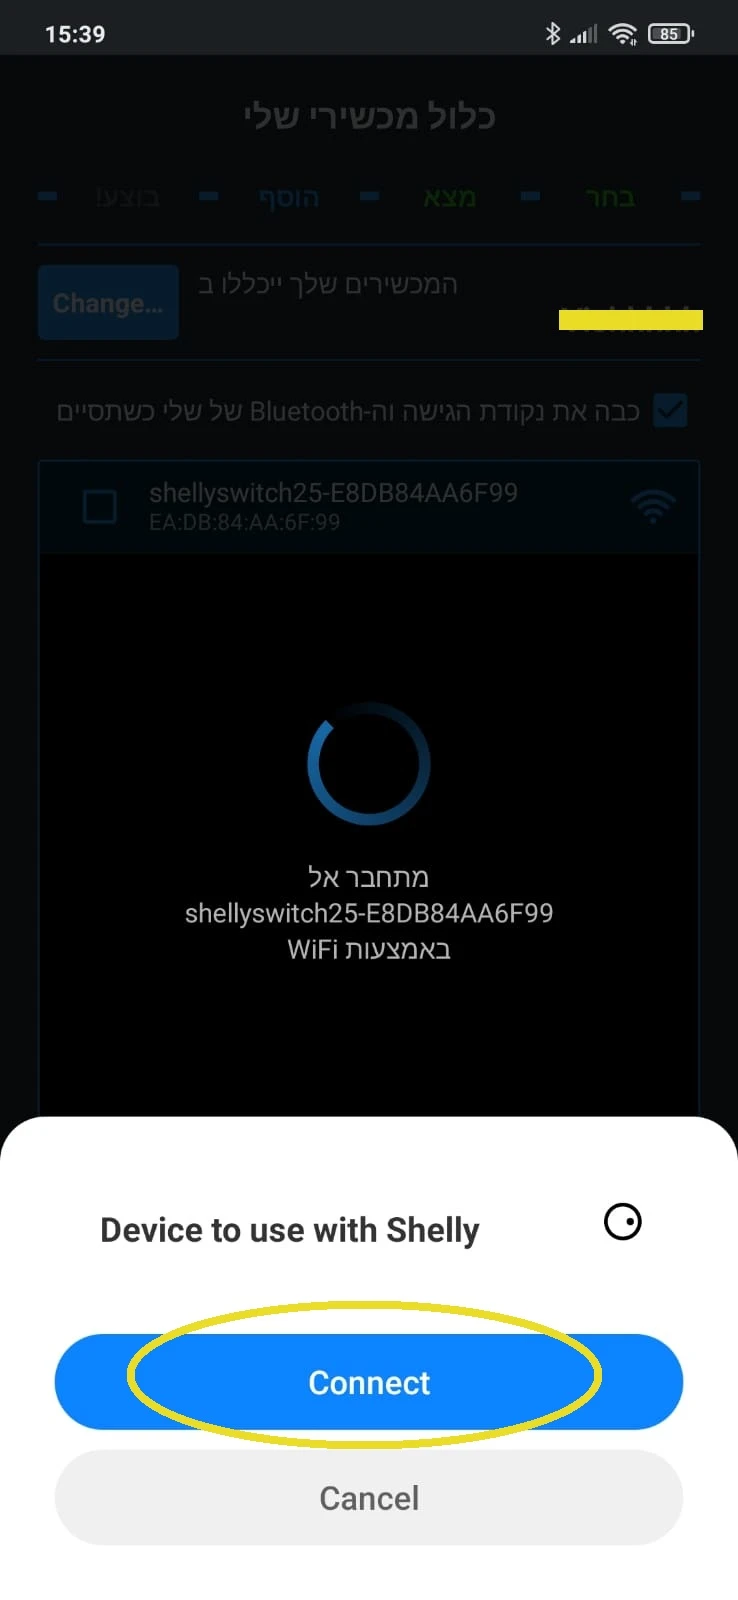
7. On Android, connect to the device
Device connection screen in the Shelly app on an Android phone
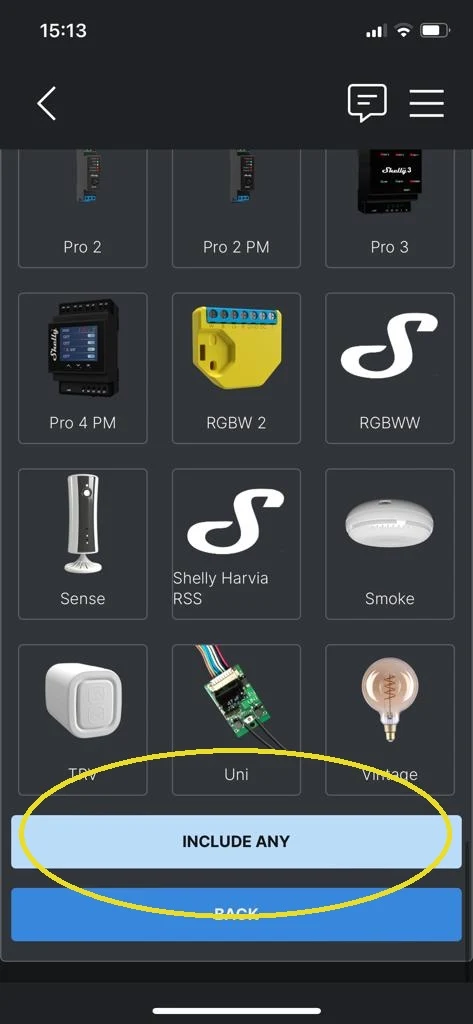
7. On iPhone, you’ll see pictures of the available devices. Choose the device you want to set up, or choose Add All
List of Shelly devices detected in the app, for choosing the device to set up
8. On Android, choose the Shelly UNI device from the list
If the app doesn’t find the device at this stage, insert a toothpick into the back of the Hub and press and hold for 12 seconds, then repeat step 5
If that still doesn’t work, go to the end of the guide and check whether one of the three causes listed there applies
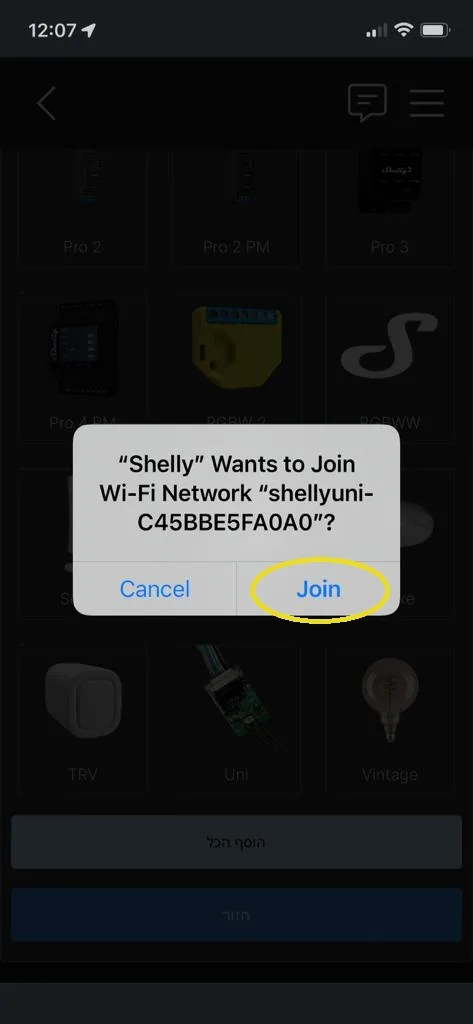
Prompt to join the Shelly network on iPhone while setting up the smart lock
8. On iPhone, you’ll be asked whether to join the Shelly network. Tap Join
If the app doesn’t find the device at this stage, insert a toothpick into the back of the Hub and press and hold for 12 seconds, then repeat step 5
If that still doesn’t work, go to the end of the guide and check whether one of the three causes listed there applies
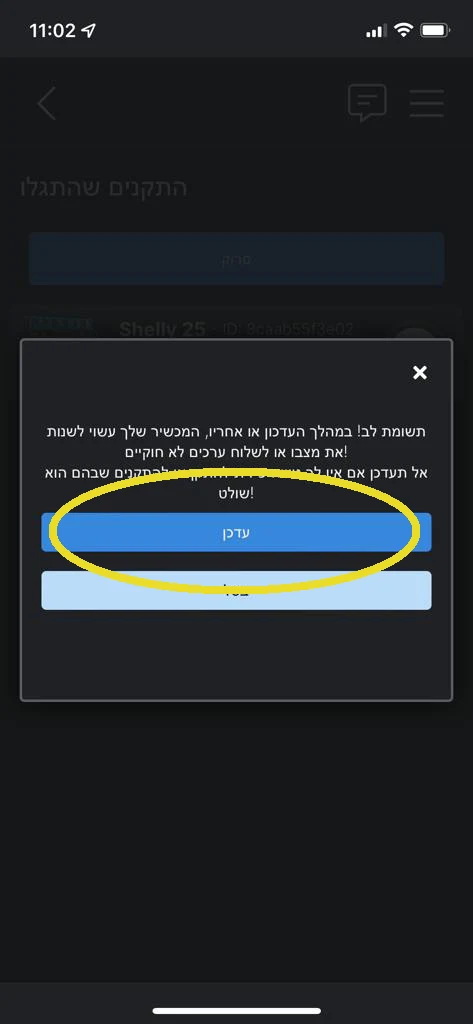
Firmware update button on the Shelly device screen in the app
9. If the device needs an update, an Update button appears. Tap it, then confirm by tapping Update. The update takes
a few minutes
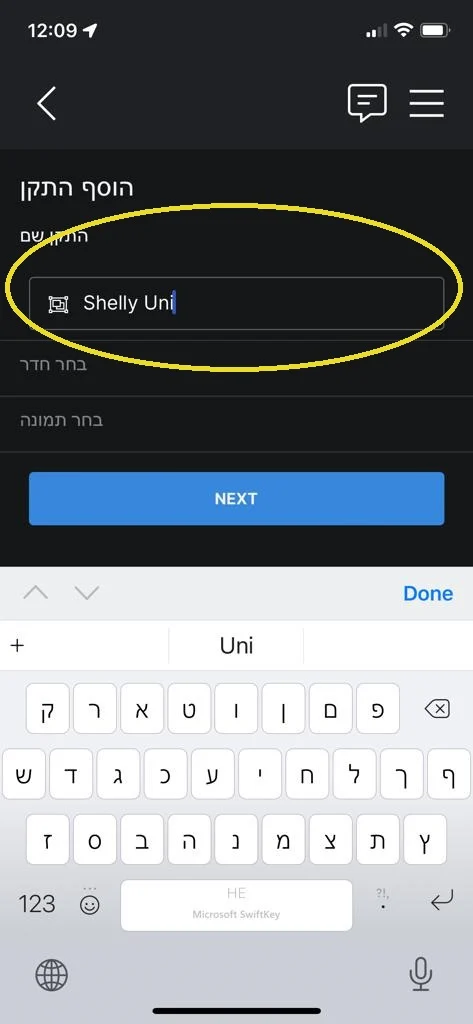
Screen for editing the device name and choosing the room in the Shelly Cloud app
10. On the device screen, you can edit the device name and choose the room. Then tap NEXT
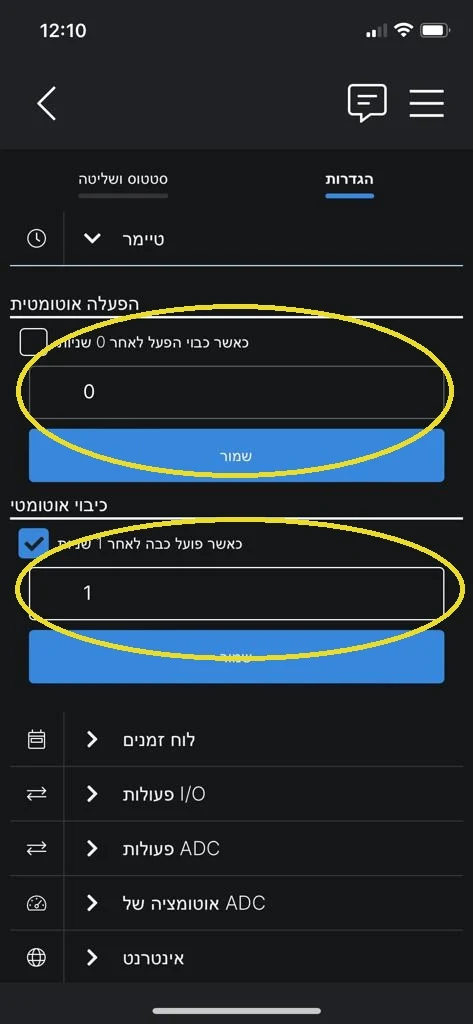
Setting up the Lock Door button and a one-second auto-off timer in the app
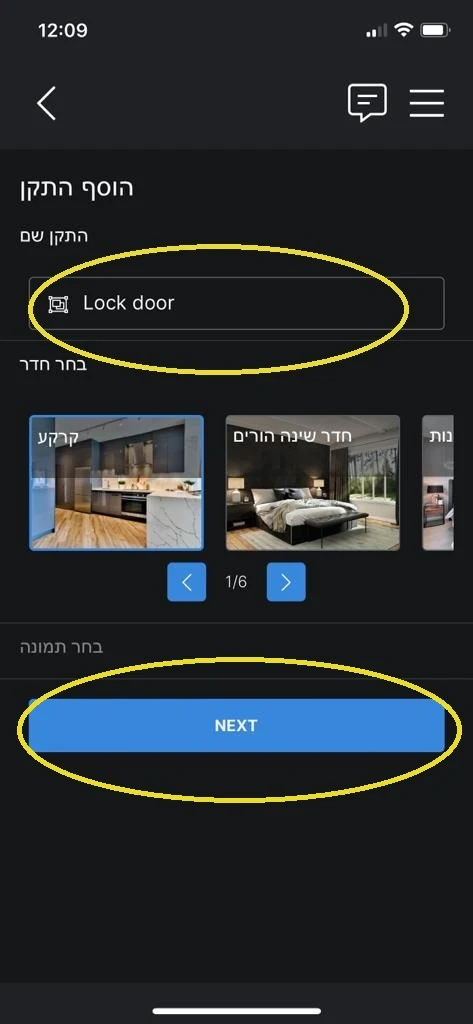
11. On the device screen, you can edit the device name and choose the room. Then tap NEXT
Shelly app: editing the LockApp Hub device name and choosing a room
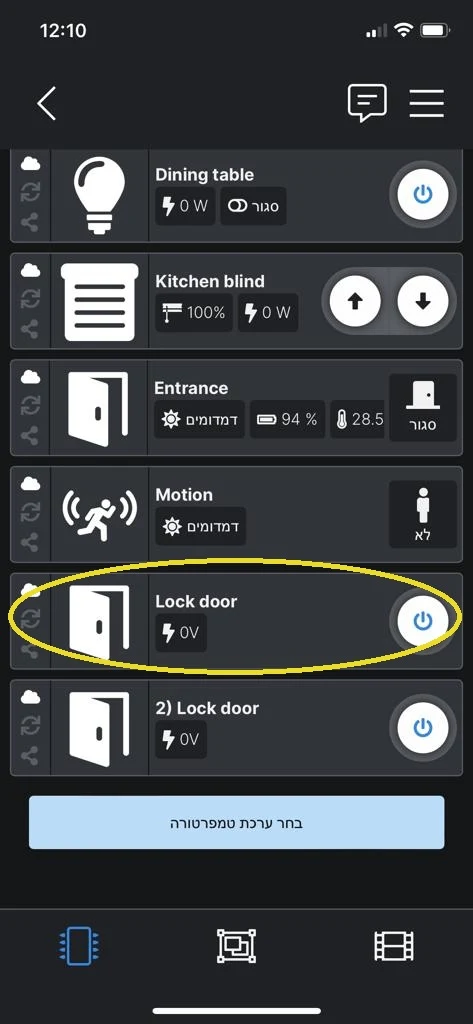
12. The device now appears in the room you assigned it to. Tap the first Lock Door to set it up
Shelly app: the device in its room, choosing Lock Door
13. Set a one-second auto-off timer (tap Settings at the top of the screen)
Shelly app: setting a one-second auto-off timer
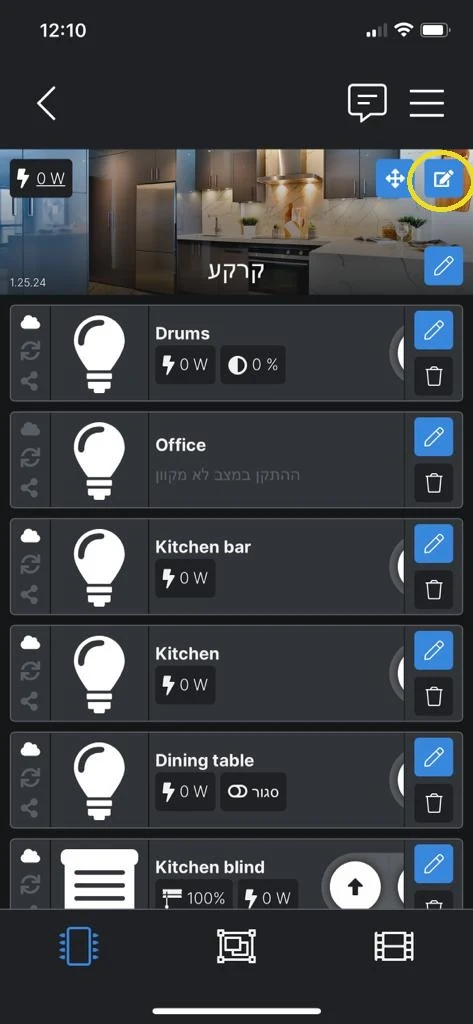
14. Go back to the room screen and tap the edit button to rename the device
Shelly app: the edit button on the room screen
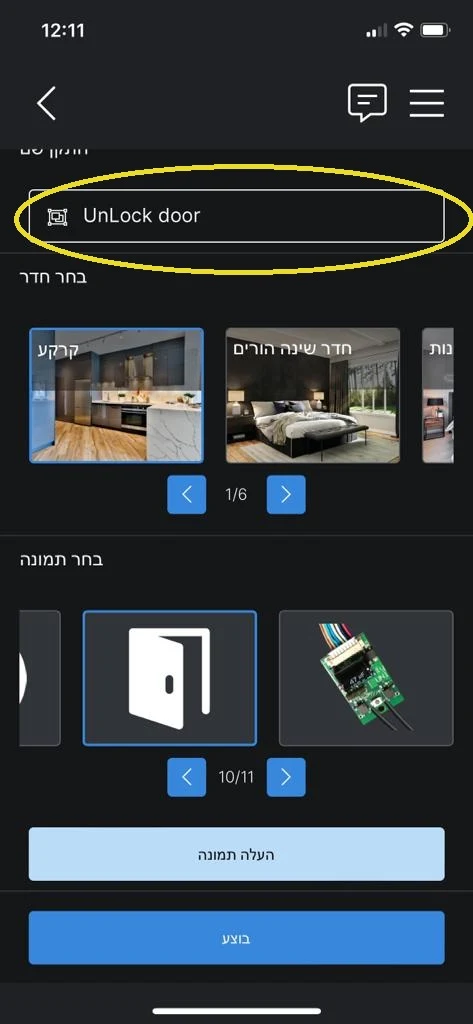
15. Rename the device to Lock Door, or any other name you like (tap Settings at the top of the screen)
Shelly app: renaming the device to Lock Door
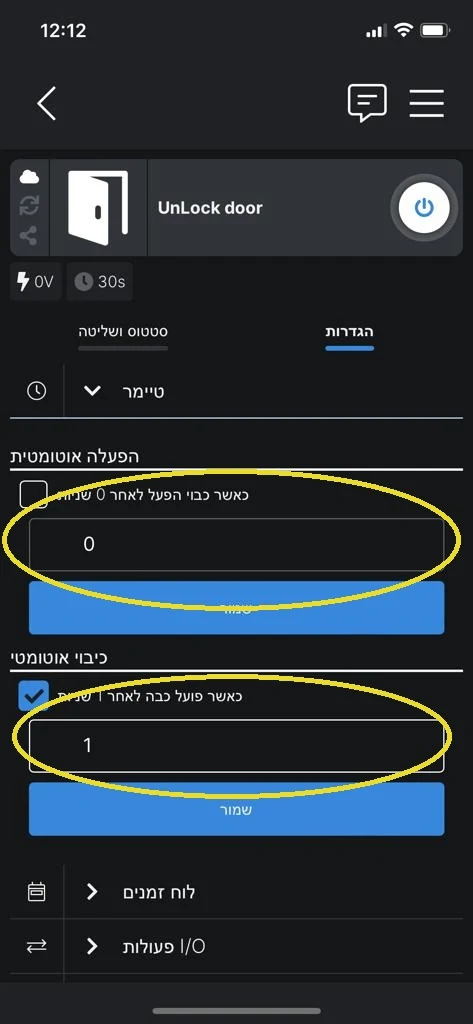
16. Again, set a one-second auto-off timer (tap Settings at the top of the screen)
Shelly app: a one-second auto-off timer for the second channel
17. Scroll to the bottom of the screen and tap Reboot
Shelly app: rebooting the device
18. Tap Yes
Shelly app: confirming the reboot
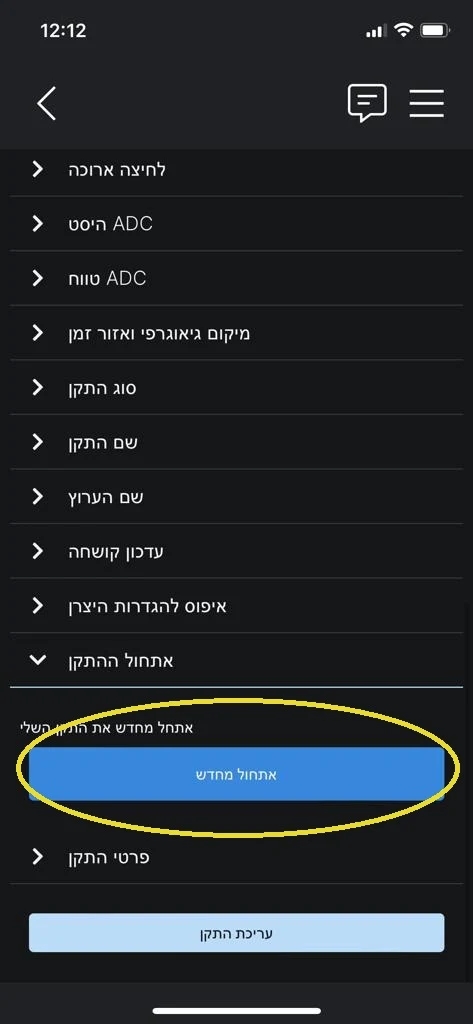
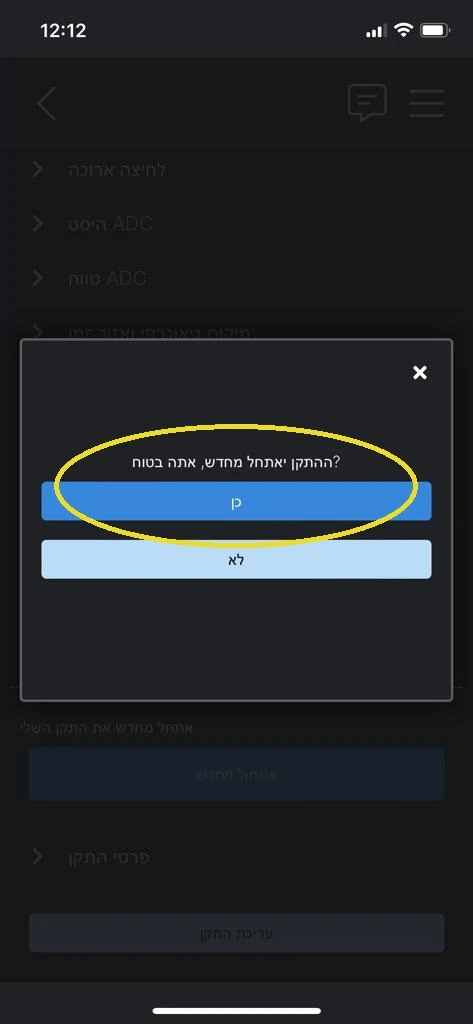
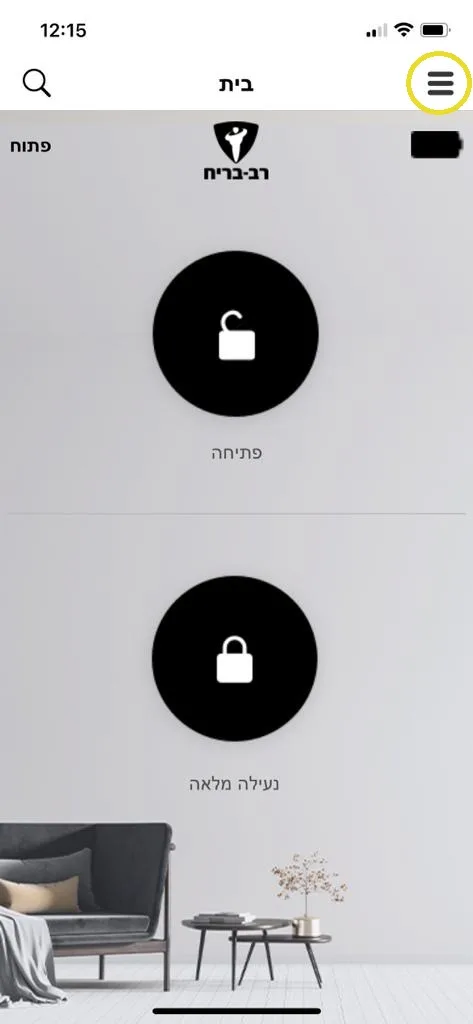
19. Open the Rav-Bariach app and tap Settings
Rav-Bariach app: the settings screen
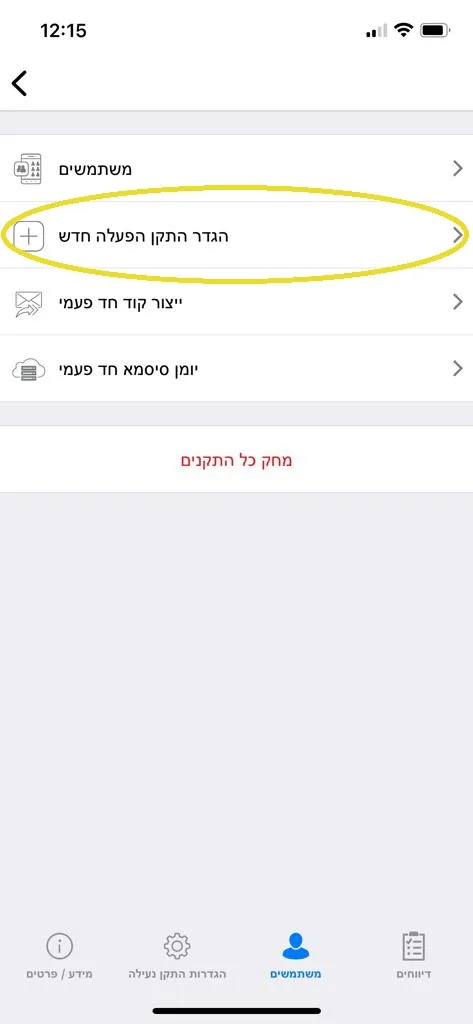
20. Choose “Set up a new activation device”
Rav-Bariach app: setting up a new activation device
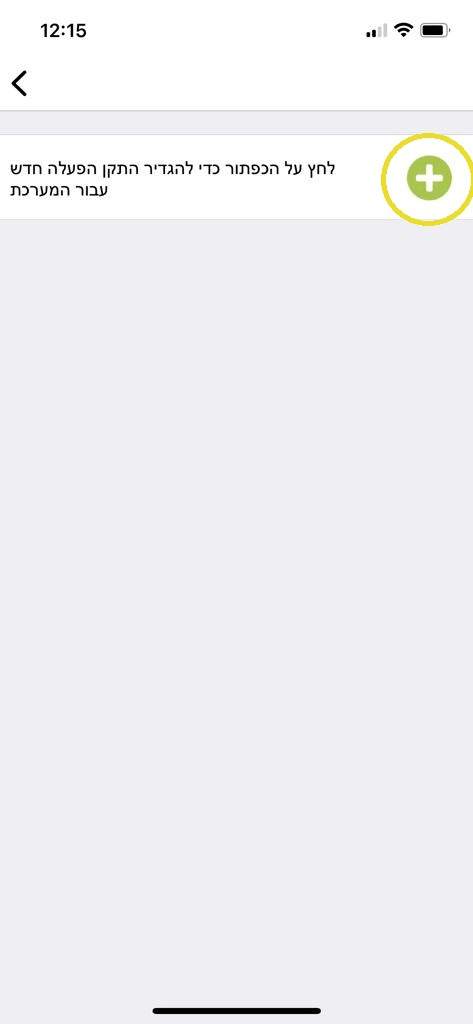
21. Tap the + button
Shelly app: editing the LockApp Hub device name and choosing a room
19. Go back to the Shelly Cloud app and tap one of the door lock buttons. Wait for the lock’s confirmation sound
and that’s it 🙂 Enjoy your smart lock!

Note:
Pairing problems can be caused by one of the following:
1. Connecting to the 5 GHz Wi-Fi band instead of 2.4 GHz. (Shelly devices work on 2.4 GHz only. We strongly recommend turning off the 5 GHz band during setup.)
2. Content filtering (such as Rimon Internet). You can contact your provider and ask them to open these ports:

  • http – port 80
  • https – port 443
  • tcp6021
  • DNS (udp53)
  • NTP (tcp123 / udp123)

3. Your internet provider’s firewall: ask them to open the ports above

Shelly
Need help with installation or setup?
Ask us, book an electrician who knows Shelly devices, or plan your home for free.