

OZZI user guide
When a device won’t connect to the app, drops off the network or doesn’t respond properly, a factory reset followed by reconnecting it solves most cases. This OZZI guide explains three ways to reset a Shelly device (a smart energy meter, a smart switch or a bulb) and how to reconnect it to the Shelly Smart Control app.
A reset erases all of the device’s settings: the Wi-Fi network, its name, schedules and automations. After the reset, you set it up again in the app.
1. Option A: press and hold the reset button
Use this when you can reach the button on the device itself: most relays, smart plugs and energy meters.
1
Make sure the device is connected to power and running.
2
Find the reset button on the device.
3
Press and hold the button for about 10 seconds, until the LED on the device flashes rapidly.
4
Release it and wait a few seconds for the device to restart.
Holding it for only about 5 seconds doesn’t reset the device. It just turns the device’s access point back on. For a full reset, hold it for 10 seconds.
2. Option B: flip the wall switch 5 times
Use this for a relay installed behind a wall switch, when you can’t reach its button.
5
Switch off the circuit breaker for that circuit in the electrical panel, then switch it back on.
6
Within the first minute after the power comes back, flip the wall switch on and off 5 times in a row.
This only works within the first minute after power is restored, and only when the switch is wired to the device’s SW input. If more than a minute has passed, repeat step 5.
3. Option C: turn the power off and on 5 times
Use this for Shelly smart bulbs, which have no button.
7
Turn the bulb on, wait 6 to 10 seconds, turn it off and wait another 6 to 10 seconds. Repeat the cycle 5 times.
8
Leave the bulb on. If it flashes, the reset worked. If it doesn’t, repeat step 7 and make sure you wait between each on and off.
4. Reconnecting to the app
Whichever option you used, add the device back in Shelly Smart Control after the reset.
9
Turn on Bluetooth and Wi-Fi on your phone, and make sure your home network is 2.4 GHz.
10
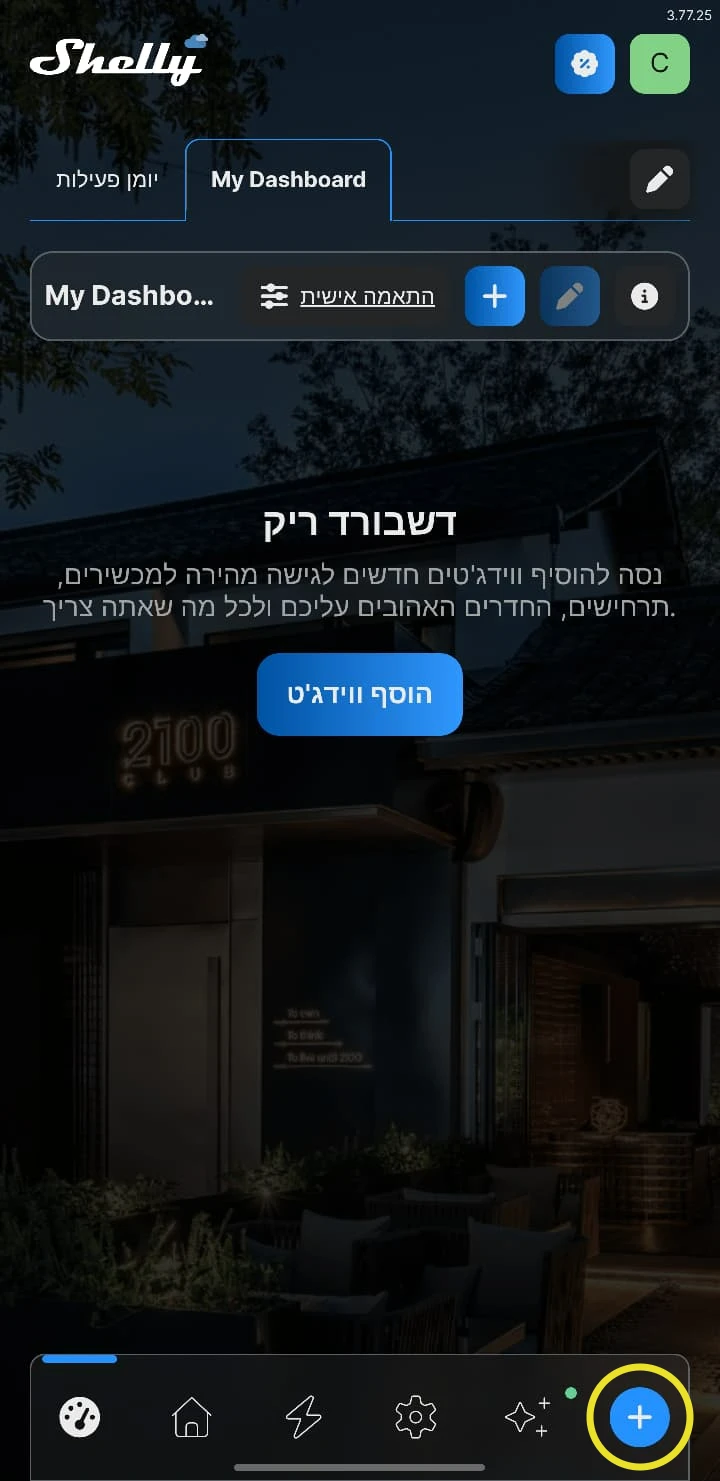
Open Shelly Smart Control and tap the “+” button in the corner of the bottom menu.
11
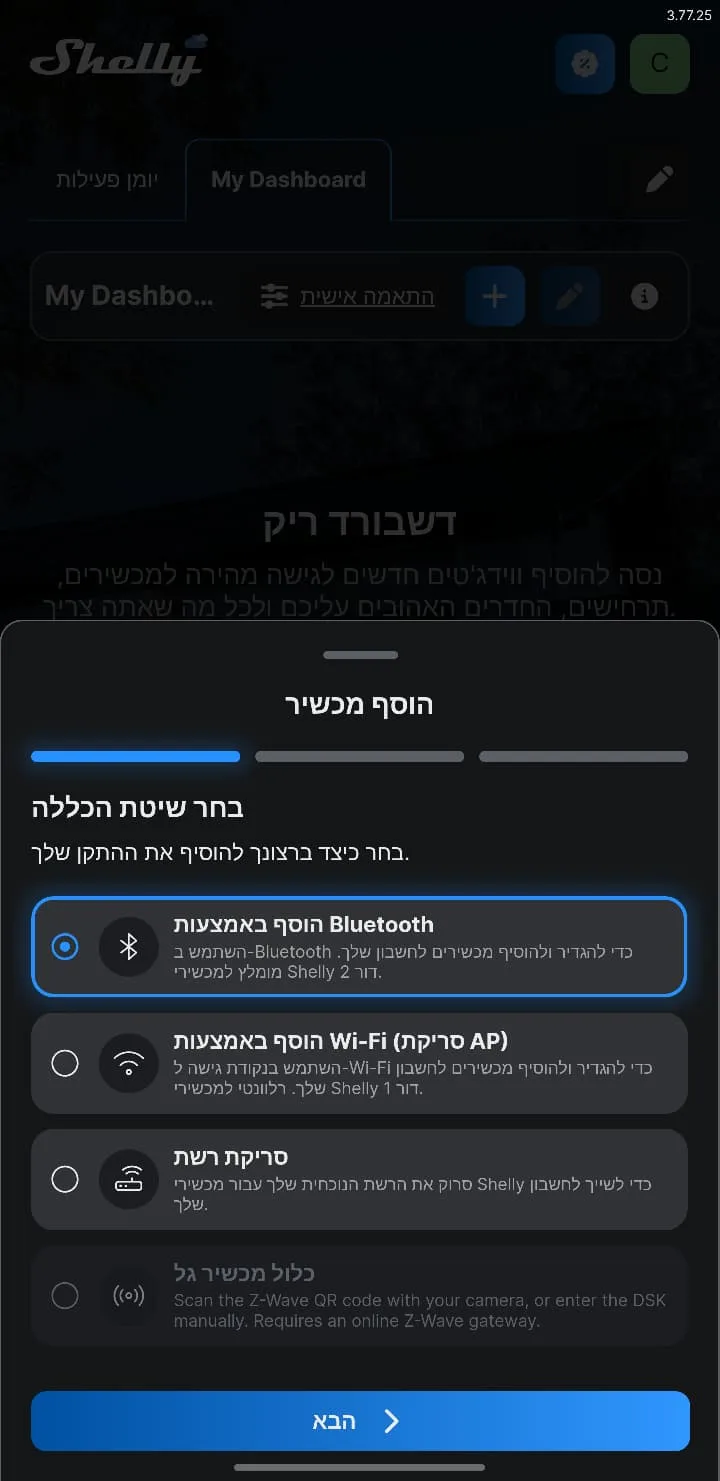
On the “Add Device” screen, choose an inclusion method and tap “Next”: “Add via Bluetooth” for Gen2 and newer devices, or “Add via Wi-Fi (AP Scan)” for Gen1 devices.
12
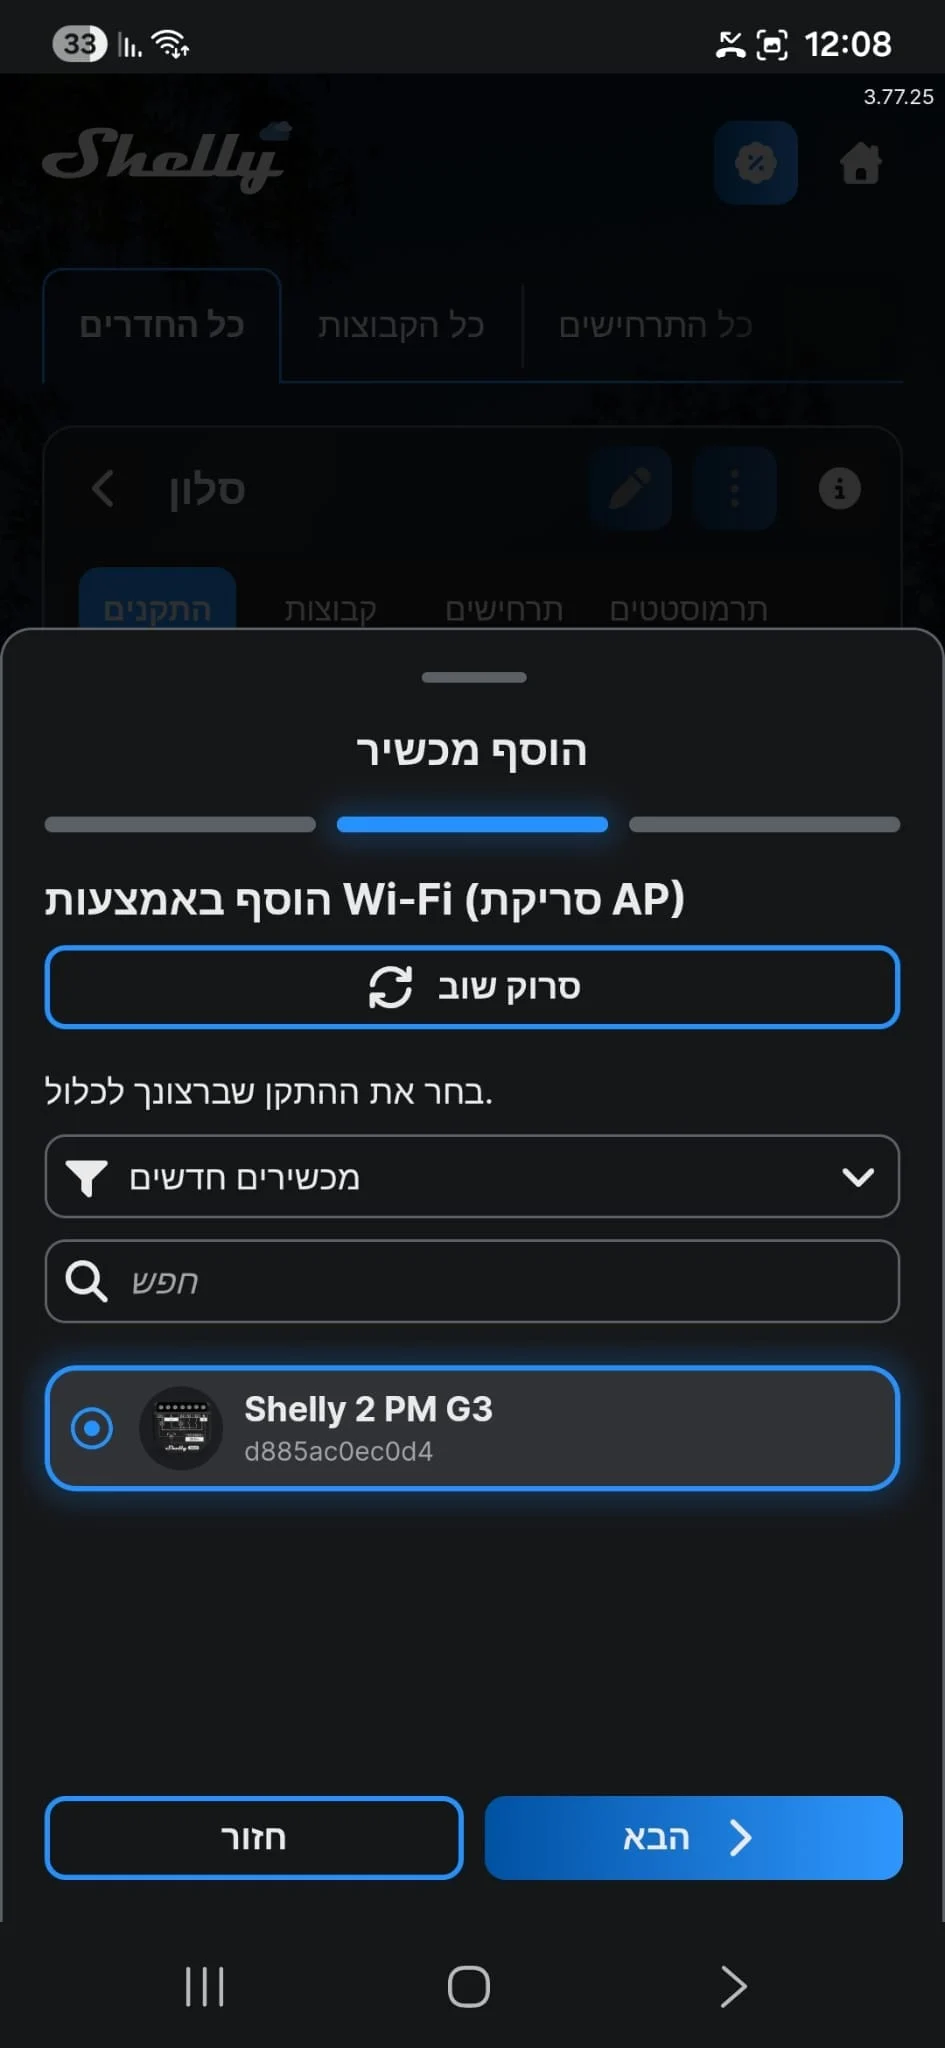
Select the device from the list and tap “Next”. If it doesn’t appear, tap “Scan Again”.
13
Select your home Wi-Fi network and enter the password.
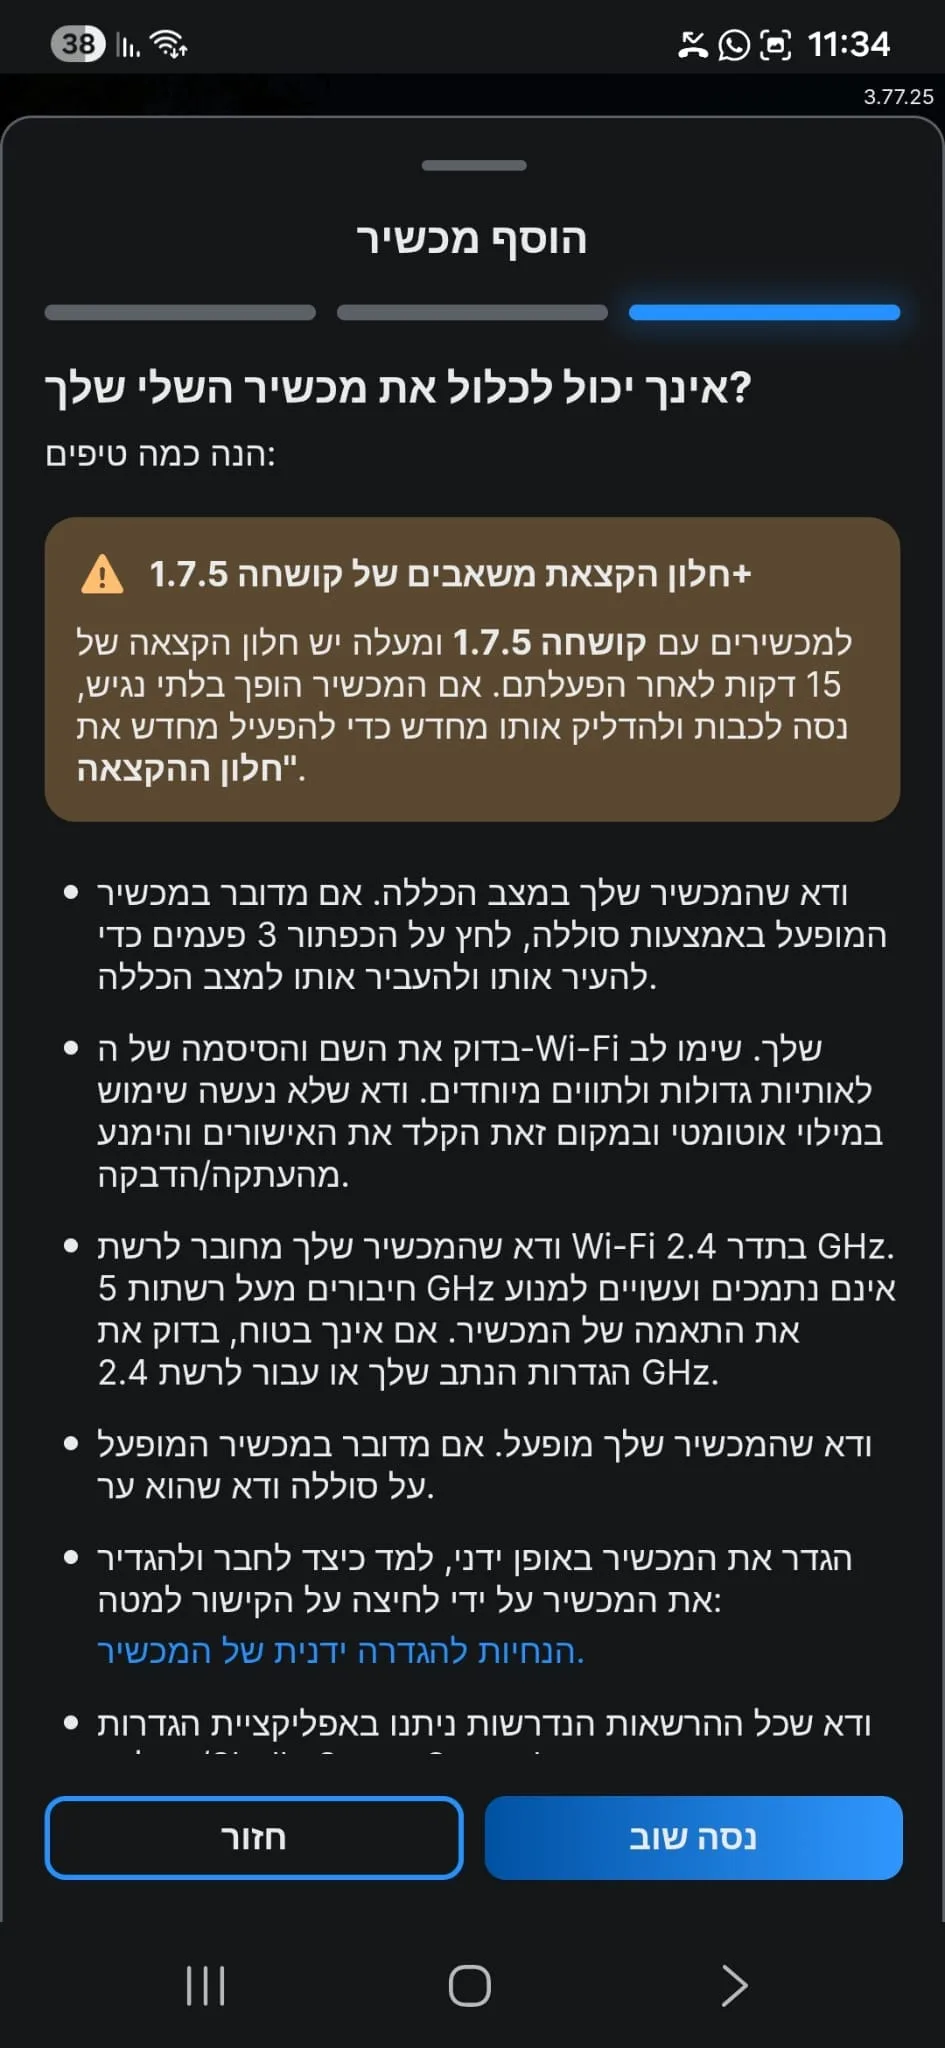
If you see the “Can’t include your Shelly device?” screen, check that the network name and password are correct (including capital letters and special characters, without autofill) and that the network is 2.4 GHz, then tap “Try Again”.
14
Give the device a name, assign it to a room and finish.
That’s it, the device is reconnected. If it still doesn’t appear in the list after “Scan Again”, bring your phone closer to the device and repeat the reset.
Optional
If the update icon appears next to the device

Update the firmware: see the firmware update guide.
A stable connection to the app is the foundation of a smart home: controlling smart switches, reading your smart energy meter, and managing and reducing your electricity use. This guide was prepared by OZZI, the official distributor of Shelly smart home products in Israel.